No-Bake Rainbow Cheesecake Bars
Highlighted under: Pastry Kitchen
I absolutely love making No-Bake Rainbow Cheesecake Bars because they're a colorful and delicious treat that never fails to impress! The combination of creamy cheesecake and vibrant layers makes them not only pleasing to the eye but also a true delight to eat. Each bite brings a burst of flavor, and the best part is that there’s no baking involved! Perfect for warm days or when we want a quick dessert, these bars are a fun and easy way to bring a smile to anyone's face.
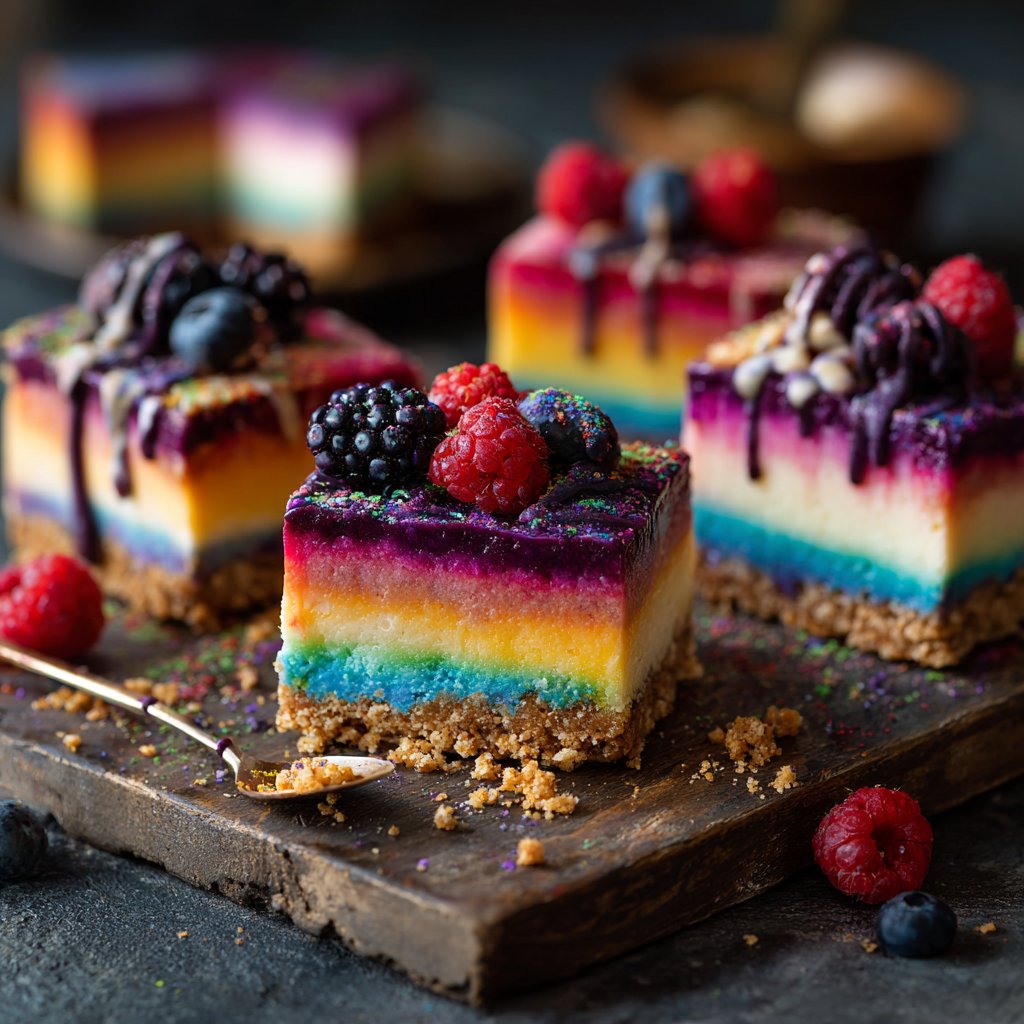
When I first decided to create No-Bake Rainbow Cheesecake Bars, I wanted something that combined the whimsy of colors with the indulgence of cheesecake. After several trials, I discovered that using gelatin gave the bars just the right stability without needing to bake them. This made it easy for me to layer different colors seamlessly, resulting in a stunning dessert that everyone enjoys.
One key detail I learned is to be patient while layering the colors; allowing each layer to set slightly before adding the next helps prevent them from bleeding together. This technique turned out to be the secret to achieving those beautiful, distinct layers that make these bars so eye-catching!
Why You'll Love This Recipe
- Vibrant layers that make it a show-stopping dessert
- No baking required for a quick and easy treat
- Creamy cheesecake texture pairs wonderfully with fresh fruit flavors
Understanding Ingredients
The foundation of a great cheesecake lies in the quality of your cream cheese. Opt for full-fat versions for the creamiest texture, as low-fat options can lead to a less stable filling. It's essential to soften the cream cheese sufficiently before mixing; this prevents lumps and ensures a smooth, velvety finish. I recommend leaving it at room temperature for about an hour or microwaving it in short bursts to soften without melting.
Using heavy whipping cream is key to achieving that light, airy quality in the cheesecake filling. When whipped properly, the cream incorporates air, resulting in a delightful texture. Be cautious not to overwhip, as it can turn grainy; beat until soft peaks form for the perfect balance. If you need a dairy-free option, coconut cream can serve as an excellent substitute, providing richness while offering a unique flavor profile.
Mastering the Layering Technique
Layering the cheesecake colors is not just about aesthetics; it also requires a bit of technique to ensure the layers hold firm without mixing. Allow each layer to set for a good 10 minutes in the fridge before adding the next. This small step ensures that each vibrant color remains distinct, creating the beautiful rainbow effect you want. If you see any bleeding between layers, it could mean that the filling wasn’t chilled enough before adding the next layer.
Using an offset spatula to spread each layer can help achieve an even distribution without disturbing the previous color. Make sure to spread from the center outward to avoid going over the edges. If you find the cheesecake too soft and difficult to manage, chilling it briefly for an additional 5-10 minutes can help firm up the layers, making your layering process smoother.
Ingredients
For the crust
- 1 ½ cups graham cracker crumbs
- ½ cup unsalted butter, melted
- 2 tablespoons sugar
For the cheesecake filling
- 16 oz cream cheese, softened
- 1 cup powdered sugar
- 2 cups whipped cream
- 1 teaspoon vanilla extract
- Food coloring (various colors)
Mix the crust ingredients and press into a pan before layering the cheesecake filling.
Instructions
Make the crust
In a bowl, combine the graham cracker crumbs, melted butter, and sugar. Mix until well combined, then press the mixture into the bottom of an 8x8 inch pan. Set aside.
Prepare the cheesecake filling
In a mixing bowl, beat the softened cream cheese until smooth. Gradually add the powdered sugar and mix until well incorporated. Fold in the whipped cream and vanilla extract until fully combined.
Color the filling
Divide the cheesecake filling into several bowls. Add different food coloring to each bowl and mix until you achieve the desired colors.
Layer the cheesecake
Starting with the first color, spread a layer of cheesecake filling over the crust. Allow it to set in the fridge for about 10 minutes. Repeat with the remaining colors, letting each layer set before adding the next.
Chill and serve
Once all layers are completed, refrigerate the bars for at least 2 hours to firm up. Slice into squares and enjoy your beautiful No-Bake Rainbow Cheesecake Bars!
Serve chilled and enjoy the colorful delight!
Pro Tips
- Experiment with flavors by adding a hint of citrus or vanilla to enhance the cheesecake layers.
Storage and Make-Ahead Tips
These No-Bake Rainbow Cheesecake Bars can be prepared a day in advance, making them perfect for parties or gatherings. Once completed, cover the pan tightly with plastic wrap or aluminum foil, and store it in the refrigerator. Just remember, they’re best enjoyed within 3-4 days for the freshest taste and texture. If you freeze them, slice them into bars first and wrap each piece individually to prevent freezer burn; they last up to a month.
To serve after freezing, allow the bars to thaw in the refrigerator overnight before serving. This approach ensures they maintain their creamy texture without becoming too soft. I find it helpful to slice them while still slightly frozen, which also creates cleaner edges for a more polished appearance.
Variations and Flavor Combinations
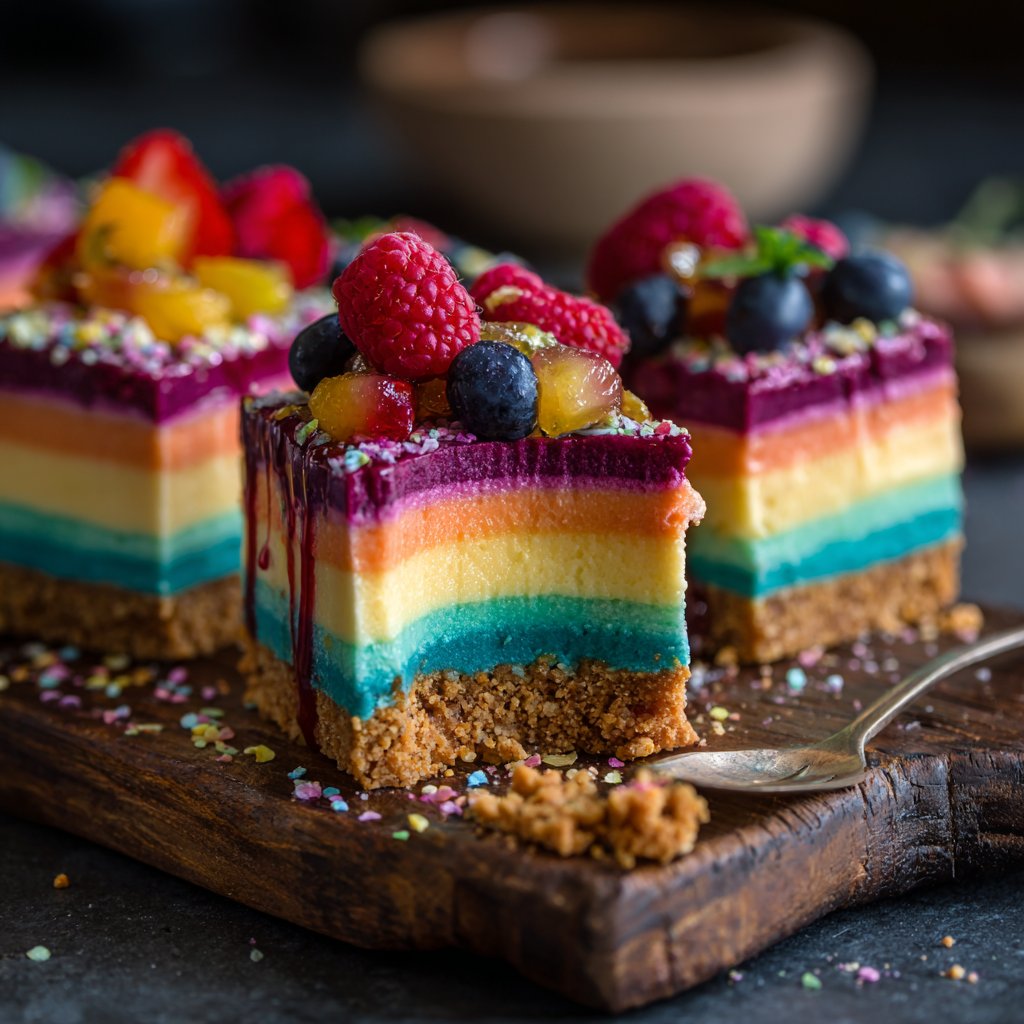
Feel free to get creative with your cheesecake flavors by adding extracts or fruits to the filling. For instance, a tablespoon of lemon or almond extract can enhance the flavor profile beautifully. Seasonal fruits like strawberries or blueberries can be pureed and swirled into the cheesecake filling for added visual interest and flavor complexity. You can also experiment with different color combinations—think pastels for Easter or vibrant colors for a summer gathering.
Another fun variation is incorporating a topping of fresh fruit before serving. Sliced strawberries, kiwi, or blueberries not only add flavor but also a nice textural contrast to the creamy cheesecake. Drizzling with a fruit glaze or a simple chocolate sauce just before serving can elevate the dessert even further, transforming it into a fancy treat for any celebration.
Questions About Recipes
→ Can I use different types of food coloring?
Absolutely! Feel free to use gel, liquid, or natural food coloring to achieve your desired shades.
→ How can I store the leftovers?
Store the cheesecake bars in an airtight container in the fridge for up to five days.
→ Can I use alternative sweeteners?
Yes, you can substitute powdered sugar with your preferred alternative; just ensure it’s suitable for baking.
→ Is it necessary to use gelatin?
No, gelatin is not necessary if you prefer a softer filling. However, it helps the bars hold their shape better.
No-Bake Rainbow Cheesecake Bars
What You'll Need
For the crust
- 1 ½ cups graham cracker crumbs
- ½ cup unsalted butter, melted
- 2 tablespoons sugar
For the cheesecake filling
- 16 oz cream cheese, softened
- 1 cup powdered sugar
- 2 cups whipped cream
- 1 teaspoon vanilla extract
- Food coloring (various colors)
How-To Steps
In a bowl, combine the graham cracker crumbs, melted butter, and sugar. Mix until well combined, then press the mixture into the bottom of an 8x8 inch pan. Set aside.
In a mixing bowl, beat the softened cream cheese until smooth. Gradually add the powdered sugar and mix until well incorporated. Fold in the whipped cream and vanilla extract until fully combined.
Divide the cheesecake filling into several bowls. Add different food coloring to each bowl and mix until you achieve the desired colors.
Starting with the first color, spread a layer of cheesecake filling over the crust. Allow it to set in the fridge for about 10 minutes. Repeat with the remaining colors, letting each layer set before adding the next.
Once all layers are completed, refrigerate the bars for at least 2 hours to firm up. Slice into squares and enjoy your beautiful No-Bake Rainbow Cheesecake Bars!
Extra Tips
- Experiment with flavors by adding a hint of citrus or vanilla to enhance the cheesecake layers.
Nutritional Breakdown (Per Serving)
- Calories: 280 kcal
- Total Fat: 18g
- Saturated Fat: 10g
- Cholesterol: 50mg
- Sodium: 270mg
- Total Carbohydrates: 29g
- Dietary Fiber: 1g
- Sugars: 18g
- Protein: 3g